December 05, 2018

Hey friends, if you know me, you know that I only endorse products that I truly use and love! Keep in mind that we may receive commissions when you click our links and make purchases.
Even thought its been a year since I got my Cricut maker, it continues to amaze me every time I use it. This is one of the easiest machines I have used. It is so user friendly and the possibilities are endless! I wanted to make a little gnome tree and couldn't find any ornaments that I really liked so I made my own with my maker!
I made the gnome and mushroom ornaments using felt and iron on! I also made a coordinating tree skirt and tiny little paper house village complete with tiny people and gnomes!
I downloaded the designs in Cricut design space. I made a few simple edits to the gnome, you can totally customize this any way that you would like!
Here is what you will need:
First create your design in Cricut Design Space. I choose a simple mushroom and a gnome. Choose your colors for each project and follow the prompts within design space once you are ready to create! I love cutting felt with the maker, it comes out perfect every single time!

You will be promoted to use the rotary blade and you should use the fabric weight cutting mat. What I love about the design space software is that it tells you exactly what you need to do. Everything is color coded and it prompts you along the way!
Next I cut out the various layers of iron on and glitter iron on.

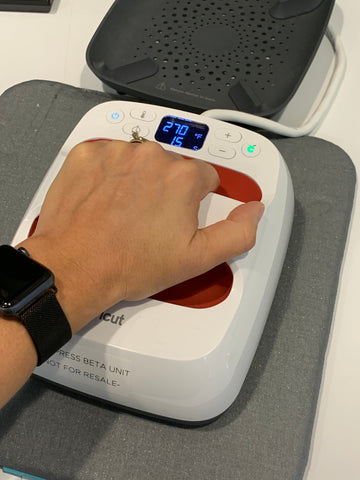
I then used my Cricut Easy Press 2 to adhere the iron on to the felt mushroom backer.

If you are not familiar with the Easy Press, they now come in 3 sizes. Which is great for a variety of projects, I love the smallest one of my smaller projects. Its really lightweight and they are all so easy to use. I simply go to the crib website, enter the materials that I am using and it tells you the temp setting and time needed. 
This mushroom was completed in just a few simple steps. I made a bunch for my tree and followed the same steps for the gnome ornaments!

I finished it up with some red and white twine to make a simple loop for hanging!
These were so easy to make. I chose pinks, red and aquas because I wanted more of a vintage vibe. I fished off my tree with lights and ornaments from Michaels stores and then made a coordinating tree skirt.
The tree skirt is approx 20" in diameter. I followed the same steps here to cut the gnomes and mushrooms, but I used heat n bond on the backs so I could adhere them directly to the tree skirt with my easy press!
I am in love with all the tiny houses out there these days too. I saw some patterns in Cricut Design Space and decided to make my own tiny village.
Heres what you need for this project:
I used the 3D houses, there is a nice variety to choose from. I also used 2 of the 3D Party Cones for the hats and body.
I had to shirk them down a bit so they didn't tower over the houses! I cut the body from yardstick and the hat and scarf from felt. I used a 1/4" wood bead for the head and a marker to make dots for the eyes.
For the gnome I used a tiny bit of faux fur and the tiniest pompom nose I could find! If you can't find then that small you could use wool roving or clay to make your own!
I added a variety of bottle brush trees to complete my little winter village!
I had the best time creating these projects with my Cricut maker! If you have any questions please leave them in the comments or come on over to Instagram and visit us!
This is a sponsored conversation written by me on behalf of Cricut. The opinions and text are all mine.
